Final Polish
In the 5th part of the tutorial we updated our application to be able to process input from user, learned something about ways different components can communicate with each other in IMA.js application and updated our guestbook API.
In this last part of the tutorial we're going to polish few things up and finally finish our guestbook application.
Improving user experience (UX)
We have a working application, but the UX (user experience) is kind-of lacking. We will address this in this section.
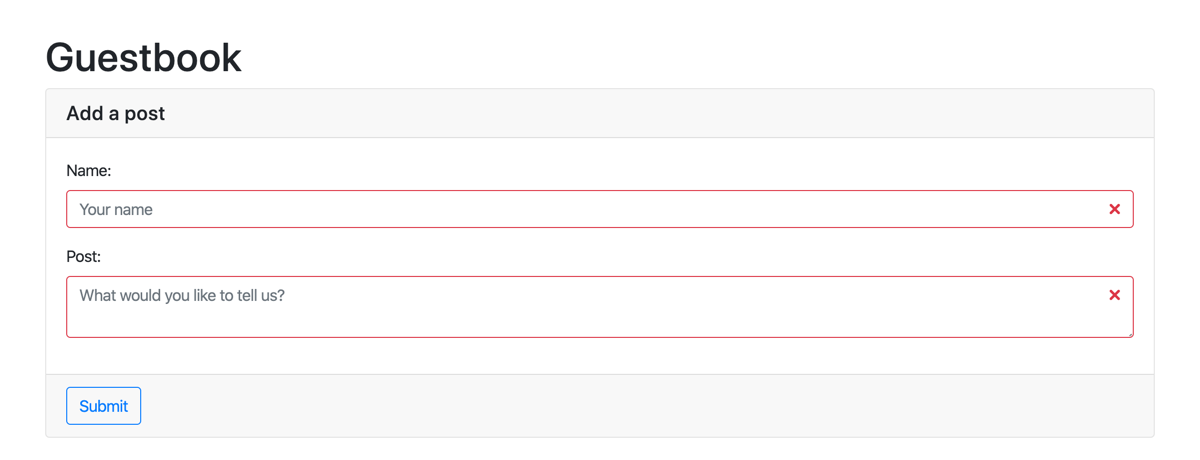
Let's start by adding validation to the posting form.
Form validation
Start by extending our constructor in the posting form component (app/component/postingForm/PostingForm.jsx)
with 2 new state keys:
constructor(props, context) {
  super(props, context);

  this.state = {
    author: '',
    content: '',
    authorValid: true,
    contentValid: true
  };
}
Next we need to update our form elements to visually correspond to the validity of the input
by updating their CSS classes. To achieve this we're going to use is-invalid class which is
taken from the Bootstrap CSS library we're using and will apply red shadow to the input if it's invalid:
<input
  id="postForm-name"
  className={this.cssClasses({
    'form-control': true,
    'is-invalid': !this.state.authorValid
  })}
  type="text"
  name="author"
  value={this.state.author}
  onChange={e => this._onChange(e)}
  placeholder="Your name"
/>
...
<textarea
  id="postForm-content"
  className={this.cssClasses({
    'form-control': true,
    'is-invalid': !this.state.contentValid
  })}
  name="content"
  value={this.state.content}
  onChange={e => this._onChange(e)}
  placeholder="What would you like to tell us?"
/>
The expression in the className attribute will set the CSS class is-invalid
on the form element depending on the current state of the authorValid or
contentValid flag, while any changes made by the user will trigger the
validation we'll add to our existing _onChange method.
For the sake of this tutorial, we're simply going to check if the inputs are empty or not. But in a serious application, you should probably implement more sophisticated validation method.
We're going to validate each input in the _onChange handler while also checking the validation
in the _onSubmit method, to cover a case, where user doesn't change any input and submits the form
immediately. This would result in false validation, since the initial state for our validation keys is true.
First we're going to implement our validation method, which checks if given input is valid and sets
the result of validation to corresponding state key while also returning the result of validation, which
we'll use later in _onSubmit method:
_validate(inputName, value) {
  const validStateKey = `${inputName}Valid`;
  let isValid = !!value;

  if (this.state[validStateKey] !== isValid) {
    this.setState({
      [validStateKey]: isValid
    });
  }

  return isValid;
}
Through the use of ES2015 dynamic properties, we're able to handle validation for both inputs in one method.
Now that we have our validation method, we can hook it up to the _onChange handler.
The updated handler with the validation will look like this:
_onChange({ target: { name, value }}) {
  this._validate(name, value);
  this.setState({
    [name]: value
  });
}
Finally, we need to prevent the user from submitting the form if any of the
inputs are invalid. To do that, update the onSubmit(event) method's content:
_onSubmit(event) {
  event.preventDefault();

  // Validate on submit to also cover the initial submission
  const { author, content } = this.state;
  if (
    !this._validate('author', author) ||
    !this._validate('content', content)
  ) {
    return;
  }

  this.fire('postSubmitted', {
    author: this.state.author,
    content: this.state.content
  });

  // Reset the state after submitting
  this.setState({
    author: '',
    content: ''
  });
}
With this, the form validation is complete. Feel free to check this in your own application and you should see red input fields if the inputs are empty, while the submit button should prevent you from submitting an empty content.
So now let's make the posting experience a little bit better.
Optimistic posting
To better illustrate the issue we're addressing, open the HTTP agent mock
class (app/mock/MockHttpAgent.js) and set the POST_DELAY to 4500. This
will introduce a 4.5 second delay before the submitted post is created in the
guest book. The delay simulates a client connecting through a narrow bandwidth
or using a mobile connection with a bad signal. Try adding a new post now and
you'll see how infuriating this can be.
We can improve the overall UX using a mechanism called optimistic posting. This means that we will display the user's post before the server confirms that it has been saved. To further improve the UX, we will mark the post as pending in the UI, so that the user will be aware that the post has not yet been saved.
Updating the service classes & home controller
We'll start by adding an extra field to our post entity
(app/model/post/PostEntity.js) by adding the following line to the
constructor:
this.isSaved = data.isSaved;
We will use the isSaved flag to determine whether the post has been saved at
the server or not.
Next we need to update the getEntityList() method in the post resource class
(app/model/post/PostResource.js):
return this._http
  .get('http://localhost:3001/static/api/posts.json', {})
  .then(response => {
    response.body.forEach(post => (post.isSaved = true));
    return response.body;
  })
  .then(postsData => this._factory.createList(postsData));
This modification sets the isSaved flag on posts retrieved from the server,
marking them as saved.
Next we need to update our home page controller
(app/page/home/HomeController.js) by modifying the body of the load()
method to the following snippet:
return {
  posts: this._postService.getPosts(),
  pendingPosts: []
};
We added the pendingPosts field to our state, which we'll use to keep track
of the posts that are being submitted to the server. We'll need the post
factory in our home controller to create the entities representing the pending
posts, so let's modify controller's the constructor by adding a new parameter
and a field for the post factory:
constructor(postService, postFactory) {
  super();

  this._postService = postService;
  this._postFactory = postFactory;
}
And, of course, we need to update the $dependencies list so OC can inject
PostFactory instance to our constructor as a second argument. so modify the dependencies of the home
page controller (app/page/home/HomeController.js) to the following:
import PostFactory from 'app/model/post/PostFactory';
...
static get $dependencies() {
  return [PostService, PostFactory];
}
Displaying pending posts
Now we need to display both the pending posts and saved posts. To do that,
we need to "patch" our controller's state to in the onPostSubmitted() event
listener after submitting the new post to update our UI:
let pendingPost = this._postFactory.createEntity(
  Object.assign(
    {
      id: null,
      isSaved: false
    },
    eventData
  )
);

let state = this.getState();
let pendingPosts = state.pendingPosts.slice();
pendingPosts.unshift(pendingPost);

this.setState({
  pendingPosts
});

this._postService
  .createPost(eventData)
  .then(savedPost => {
    // update the state in place
    pendingPost.isSaved = true;
    pendingPost.id = savedPost.id;

    // update the UI
    let state = this.getState();
    this.setState({
      pendingPosts: state.pendingPosts
    });

    return this._postService.getPosts();
  })
  .then(posts => {
    let state = this.getState();

    this.setState({
      posts: posts,
      pendingPosts: state.pendingPosts.filter(post => post !== pendingPost)
    });
  });
Woa, that's a lot of code! Don't worry, we'll break it down.
Recap
First we create a new post entity from our form data augmented with the id
and isSaved fields to represent our pending post. Next we fetch the current
state and patch the pendingPosts field to our state by prepending the pending
post (we want our newest post to be displayed at the top of the list).
Next we ask the post service to create the post and when the post is created,
we mark the pending post as saved, set its ID, patch the pendingPosts field
in the state and refresh the posts list from the server.
Once the updated list of posts is retrieved from the server, we remove the
pending post from the pendingPosts array (since it is saved at the server
now, it is among the posts fetched from the server) and update the state.
Updating view components
Now that our state contains both the pending and saved posts, we can move to
the view. Open the controller's view (app/page/home/HomeView.jsx) and update
the _renderPosts() method:
let allPosts = this.props.pendingPosts.concat(this.props.posts);

return allPosts.map(post => {
  return (
    <Post
      key={post.id}
      content={post.content}
      author={post.author}
      isSaved={post.isSaved}
    />
  );
});
We concatenate the pending posts and saved posts into a single allPosts
array and then render it using our Post component. Notice that we added the
isSaved attribute - we'll use that in a moment.
So let's turn our attention to the post component
(app/component/post/Post.jsx). Update the render() method to the following
snippet:
const { content, author, isSaved } = this.props;

return (
  <div
    className={this.cssClasses({
      post: true,
      card: true,
      'card-default': true,
      'post-pending': !isSaved
    })}>
    <div className="card-body">{content}</div>
    <div className="post-author card-footer">{author}</div>
  </div>
);
Nothing really new here, we're just adding the post-pending CSS class on our
post's root element if the post is not saved yet.
Open the post's style file (app/component/post/post.less) and add the
following the content:
.post-pending .card-body {
  background: #e9e9e9;
}
Try adding new posts - you'll see them highlighted until they are saved.
However, should you try to quickly add several posts, you may notice a weird
behavior - there is only a single pending post shown, the last one. This is
caused by the fact that all our pending posts have their IDs set to null, so
React considers them to be the same post (remember how we use the post ID to identify the post in the DOM?).
To fix that we introduce a new field to our home page controller
(app/page/home/HomeController.js) in the constructor:
this._lastPendingPostId = 0;
...and use it in the onPostSubmitted() method by replacing the
let pendingPost = ... with the following:
let pendingPost = this._postFactory.createEntity(
  Object.assign(
    {
      id: `pending-${this._lastPendingPostId++}`,
      isSaved: false
    },
    eventData
  )
);
This will ensure that all our pending posts will have unique IDs, which will be
also prefixed with pending- to prevent possible collisions with the IDs
generated by our backend.
Auto-refresh
Our guest book sure does look better, but we have to actually refresh the page (or write a new post) to see whether someone else did not post a new post. So let's take care of that.
In our case we'll use polling of our REST API. You may want to use a WebSocket or Server-sent events in a real-world application to enable real-time updates. Using either of these technologies would require us to write an actual backend for our application, which is beyond the scope of this tutorial.
REST API pooling
So, to start, add a new field in the home page controller's
(app/page/home/HomeController.js) constructor which will hold information
about an interval we'll use to pool our API:
this._refreshIntervalId = null;
Next add the following configuration constant below the import ...
declaration at the beginning of the file:
const REFRESH_DELAY = 2000; // milliseconds
To initialize our refresh cycle, we'll use one of the lifecycle methods that
each IMA.js Controller has, an activate() method. To learn more about the
lifecycle of Controller and it's methods,
take a look at the documentation. In our case
the activate method will look like this:
activate() {
  this._refreshIntervalId = setInterval(() => this._refresh(), REFRESH_DELAY);
}
To clear a pending refresh timeout, we'll use the deactivate() method:
deactivate() {
  if (this._refreshIntervalId) {
    clearInterval(this._refreshIntervalId);
  }
}
And, finally, we can implement our _refresh() method:
_refresh() {
  this._postService.getPosts().then(posts => {
    this.setState({ posts });
  });
}
You won't see it because our HTTP communication is only mocked, but the posts are now being refreshed every 2 seconds. But since we do want to see something happening, let's build a random post generator real quick.
Random generators
To build our random post generator we'll create several new files. Start by
creating the app/mock/TextGenerator.js file with the following contents:
const WORDS = [
  'lorem', 'ipsum', 'dolor', 'sit', 'amet', 'consectetur', 'adipiscing',
  'elit', 'ut', 'aliquam', 'purus', 'amet', 'luctus', 'venenatis', 'lectus',
  'magna', 'fringilla', 'urna', 'porttitor', 'rhoncus', 'non', 'enim',
  'praesent', 'elementum', 'facilisis', 'leo', 'vel', 'est', 'ullamcorper',
  'eget', 'nulla', 'facilisi', 'etiam', 'dignissim', 'diam', 'quis',
  'lobortis', 'scelerisque', 'fermentum', 'dui', 'faucibus', 'in', 'ornare',
  'quam', 'viverra', 'orci', 'sagittis', 'eu', 'volutpat', 'odio', 'mauris',
  'massa', 'vitae', 'tortor', 'condimentum', 'lacinia', 'eros', 'donec', 'ac',
  'tempor', 'dapibus', 'ultrices', 'iaculis', 'nunc', 'sed', 'augue', 'lacus',
  'congue', 'eu', 'consequat', 'felis', 'et', 'pellentesque', 'commodo',
  'egestas', 'phasellus', 'eleifend', 'pretium', 'vulputate', 'sapien', 'nec',
  'aliquam', 'malesuada', 'bibendum', 'arcu', 'curabitur', 'velit', 'sodales',
  'sem', 'integer', 'justo', 'vestibulum', 'risus', 'ultricies', 'tristique',
  'aliquet', 'tortor', 'at', 'auctor', 'urna', 'id', 'cursus', 'metus', 'mi',
  'posuere', 'sollicitudin', 'orci', 'a', 'semper', 'duis', 'tellus', 'mattis',
  'nibh', 'proin', 'nisl', 'venenatis', 'a', 'habitant', 'morbi', 'senectus',
  'netus', 'fames', 'turpis', 'tempus', 'pharetra', 'pharetra', 'mi',
  'hendrerit', 'gravida', 'blandit', 'hac', 'habitasse', 'platea', 'dictumst',
  'quisque', 'sagittis', 'consequat', 'nisi', 'suscipit', 'maecenas', 'cras',
  'aenean', 'placerat', 'vestibulum', 'eros', 'tincidunt', 'erat', 'imperdiet',
  'euismod', 'nisi', 'porta', 'mollis', 'leo', 'nisl', 'ipsum', 'nec',
  'nullam', 'feugiat', 'fusce', 'suspendisse', 'potenti', 'vivamus', 'dictum',
  'varius', 'sapien', 'molestie', 'ac', 'massa', 'accumsan', 'vitae', 'arcu',
  'vel', 'dolor', 'enim', 'neque', 'convallis', 'neque', 'tempus', 'nam',
  'pulvinar', 'laoreet', 'interdum', 'libero', 'est', 'tempor', 'elementum',
  'nunc', 'risus', 'cum', 'sociis', 'natoque', 'penatibus', 'magnis', 'dis',
  'parturient', 'montes', 'nascetur', 'ridiculus', 'mus', 'accumsan', 'lacus',
  'volutpat', 'dui', 'ligula', 'libero', 'justo', 'diam', 'rhoncus', 'felis',
  'et', 'mauris', 'ante', 'metus', 'commodo', 'velit', 'non', 'tellus',
  'purus', 'rutrum', 'fermentum', 'pretium', 'elit', 'vehicula'
];

export default class TextGenerator {
  static get $dependencies() {
    return [];
  }

  generateSentence(
    minWords = 3,
    maxWords = 12,
    minSubSentences = 1,
    maxSubSentences = 4
  ) {
    let subSentencesCount = this._random(minSubSentences, maxSubSentences);
    let subSentences = [];

    for (let i = 0; i < subSentencesCount; i++) {
      let wordCount = this._random(minWords, maxWords);
      let words = [];

      for (let j = 0; j < wordCount; j++) {
        words.push(WORDS[this._random(0, WORDS.length - 1)]);
      }

      subSentences.push(words.join(' '));
    }

    let rawSentence = subSentences.join(', ') + '.';
    return rawSentence.substring(0, 1).toUpperCase() + rawSentence.substring(1);
  }

  generateParagraph(minSentences = 1, maxSentences = 5) {
    let sentenceCount = this._random(minSentences, maxSentences);
    let sentences = [];

    for (let i = 0; i < sentenceCount; i++) {
      sentences.push(this.generateSentence());
    }

    return sentences.join(' ');
  }

  _random(min, max) {
    return Math.floor(Math.random() * (max - min + 1)) + min;
  }
}
This is a very simple lorem ipsum generator - generator of random text that is used as a filler that behaves like an ordinary text. For example when a webpage layout is being tested.
Random name generator
Next we need a name generator, so create the app/mock/NameGenerator.js file
with the following content:
const CHAINS = [
  'ay', 'ho', 'ri', 'tus', 'ga', 'ni', 'of', 'me', 'ar', 'gorn', 'vas', 'si'
];

export default class NameGenerator {
  static get $dependencies() {
    return [];
  }

  generateName() {
    let chainCount = this._random(2, 5);
    let parts = [];

    for (let i = 0; i < chainCount; i++) {
      parts.push(CHAINS[this._random(0, CHAINS.length - 1)]);
    }

    return parts.join('');
  }

  _random(min, max) {
    return Math.floor(Math.random() * (max - min + 1)) + min;
  }
}
This script generates random names using short chains of letters the script combines together.
Random post generator
To combine it all up and create the post generator which uses our previously created name and text generators,
which we'll inject as dependencies, to create a post. create the app/mock/PostGenerator.js file with the
following content:
import TextGenerator from 'app/mock/TextGenerator';
import NameGenerator from 'app/mock/NameGenerator';

export default class PostGenerator {
  static get $dependencies() {
    return [TextGenerator, NameGenerator];
  }

  constructor(textGenerator, nameGenerator) {
    this._textGenerator = textGenerator;
    this._nameGenerator = nameGenerator;
  }

  generatePost() {
    return {
      author: this._nameGenerator.generateName(),
      content: this._textGenerator.generateParagraph()
    };
  }
}
This script uses our text and name generators to generate post data similar to the data we obtain from our posting form.
Updating the MockHttpAgent
Now we just need to integrate the post generator with our mock Http to simulate
other users writing new posts to our guestbook. Open our Http mock
(app/mock/MockHttpAgent.js) and add the following constants after the POST_DELAY
constant:
const AUTO_POST_DELAY_MIN = 1500; // milliseconds
const AUTO_POST_DELAY_MAX = 6500; // milliseconds
Next we need to update the constructor along with it's $dependencies:
import PostGenerator from 'app/mock/PostGenerator';

...

static get $dependencies() {
  return [
    '$HttpAgentProxy',
    '$Cache',
    '$CookieStorage',
    '$Settings.$Http',
    '$Window',
    PostGenerator
  ];
}

constructor(proxy, cache, cookie, config, window, postGenerator) {
  super(proxy, cache, cookie, config);

  this._postGenerator = postGenerator;

  this._posts = null;

  if (window.isClient()) {
    setTimeout(
      this._generateRandomPost.bind(this),
      this._random(AUTO_POST_DELAY_MIN, AUTO_POST_DELAY_MAX)
    );
  }
}
Here we use the window utility provided by IMA.js to determine whether the code is being executed at the client or the server side, as we want our posts to be generated only at the client side.
Now we need to integrate our new post generator logic:
_generateRandomPost() {
  this.post('', this._postGenerator.generatePost()).then(() => {
    setTimeout(
      this._generateRandomPost.bind(this),
      this._random(AUTO_POST_DELAY_MIN, AUTO_POST_DELAY_MAX)
    );
  });
}

_random(min, max) {
  return Math.floor(Math.random() * (max - min + 1)) + min;
}
With our application logic ready, only thing that needs to be done now is to refresh your browser and you should see see a new post being added every few seconds with a random delay. What a lively discussion!
Handling race conditions
Looking back at the previous sub-chapter, we introduced a race condition into our application. We are currently fetching our posts both periodically and when a new post is submitted. The problem is that there is no guarantee in which order the server responses would arrive since the computer network may cause various delays. This could lead to us showing the user a newer version of posts list, then switching to an older version which may not contain the latest post, and then switching to the new version with the next refresh. This problem could be even more obvious if we used real-time updates using WebSockets or Server-sent events.
One way to handle this is not to fetch the posts after the user submits a new post, but this would reduce the UX in our implementation, so this is not the way we want to go.
Also, the fact that we display a post as saved before we reload the posts list may result in the post being displayed at the wrong position in the posts list. So let's start with this issue first.
Pending posts race condition
Open the home page controller (app/page/home/HomeController.js) and update
the onPostSubmitted() method by replacing the
this._postService.createPost(eventData)... expression with the following
code:
this._postService
  .createPost(eventData)
  .then(() => this._postService.getPosts())
  .then(posts => {
    let state = this.getState();

    this.setState({
      posts: posts,
      pendingPosts: state.pendingPosts.filter(post => post !== pendingPost)
    });
  });
What we did here is that we removed the logic that updated the state (and, as a result, the UI) when the post is saved. Now the state (and UI) is updated only when we fetch the posts from the server (or the HTTP agent mock in our case).
With this issue taken care of, let's resolve the posts refresh race condition.
Posts refresh race condition
To fix our refresh race condition, we'll envelope the server responses and add a timestamp at which
the response has been generated. Open the app/assets/static/api/posts.json
file and update its contents as follows:
{
  "generated": 1420070400000,
  "posts": [
    {
      "id": 4,
      "content": "Never mistake motion for action.",
      "author": "Ernest Hemingway"
    },
    {
      "id": 3,
      "content": "Quality means doing it right when no one is looking.",
      "author": "Henry Ford"
    },
    {
      "id": 2,
      "content": "We are what we repeatedly do. Excellence, then, is not an act, but a habit.",
      "author": "Aristotle"
    },
    {
      "id": 1,
      "content": "Reality is merely an illusion, albeit a very persistent one.",
      "author": "Albert Einstein"
    }
  ]
}
We wrapped the array posts into an object and added the generated field set
to the UNIX timestamp (with millisecond precision) of the moment the response
was generated by the server.
Now we need to update the get() method of our Http mock
(app/mock/MockHttpAgent.js):
if (!this._posts) {
  return super.get(url, data).then((response) => {
    this._posts = response.body.posts;

    return {
      body: {
        generated: Date.now(),
        posts: this._posts.map(post => Object.assign({}, post))
      }
    };
  });
}

return new Promise((resolve) => {
  setTimeout(() => {
    resolve({
      body: {
        generated: Date.now(),
        posts: this._posts.map(post => Object.assign({}, post))
      }
    });
  }, GET_DELAY);
});
These are just minor updates - we get the posts array from the posts field in
the server response and generate an object with the posts and generated
fields as a response instead of just a plain array of data objects.
Updating the PostResource
Next update the getEntityList() method of the post resource
(app/model/post/PostResource.js):
return this._http
  .get('http://localhost:3001/static/api/posts.json', {})
  .then(response => {
    response.body.posts.forEach(post => (post.isSaved = true));

    let posts = this._factory.createList(response.body.posts);
    posts.generated = response.body.generated;

    return posts;
  });
What we do here is that we "unpack" the server response and set the generated
timestamp on the posts array directly (note that a custom entity representing
the posts list and the generated timestamp would be better, but this will do
for the purpose of demonstration).
Updating the HomeController
Finally, we just need to check in our home page controller
app/page/home/HomeController.js whether the posts list we just received is not
stale. Update the _refresh() method:
this._postService.getPosts().then(posts => {
  let state = this.getState();
  if (posts.generated < state.posts.generated) {
    return;
  }

  this.setState({ posts });
});
...and update the body of the last then callback in the onPostSubmitted()
method:
let state = this.getState();

if (posts.generated < state.posts.generated) {
  posts = state.posts;
}

this.setState({
  posts: posts,
  pendingPosts: state.pendingPosts.filter(post => post !== pendingPost)
});
We added simple checks that compares the generated timestamps of the received
posts with our current posts, and discards the received posts if they are
stale.
Animations
We can further improve the UX using animations. Modify the
app/component/post/post.less file by adding the following declaration at the
end of the file:
.post .card-body {
  transition: 0.3s background;
}
This adds a soft transition of the post's background color. Or does it? The
transition does not seem to work, because we change the ID (remember the key
attribute we set to post.id in app/page/home/HomeView.jsx?) of the post in
the DOM once we receive it from the server. Because of this the React
considers it to be a different post and removes the old one while adding a new
one to the DOM instead of modifying the original post DOM, so no transition
takes place.
Retaining original post ID
What we need is for the post to retain the ID we provided it with even after we
receive the response from the server. Fortunately, we can fix this easily in
our home page controller (app/page/home/HomeController.js).
Rename the _lastPendingPostId field declared in the constructor to
_lastLocalPostId as it better suits our new use. After that, create the
_localPostIds in the constructor:
this._localPostIds = new Map();
Next update the onPostSubmitted() method:
let pendingPost = this._postFactory.createEntity(
  Object.assign(
    {
      id: `local-${++this._lastLocalPostId}`,
      isSaved: false
    },
    eventData
  )
);

let state = this.getState();
let pendingPosts = state.pendingPosts.slice();
pendingPosts.unshift(pendingPost);
this.setState({
  pendingPosts
});

this._postService
  .createPost(eventData)
  .then(createdPost => {
    this._localPostIds.set(createdPost.id, pendingPost.id);
    return this._postService.getPosts();
  })
  .then(posts => {
    let state = this.getState();

    if (posts.generated < state.posts.generated) {
      posts = state.posts;
    }

    posts.forEach(post => {
      if (this._localPostIds.has(post.id)) {
        post.id = this._localPostIds.get(post.id);
      }
    });

    this.setState({
      posts: posts,
      pendingPosts: state.pendingPosts.filter(post => post !== pendingPost)
    });
  });
Finally, update the _refresh() method:
this._postService.getPosts().then(posts => {
  let state = this.getState();
  if (posts.generated < state.posts.generated) {
    return;
  }

  posts.forEach(post => {
    if (this._localPostIds.has(post.id)) {
      post.id = this._localPostIds.get(post.id);
    }
  });

  this.setState({ posts });
});
The posts created by the user viewing the page will now maintain their IDs and see a soft transition of the post's background once the post is saved at the backend.
Animating new posts
Let's add some animation to the newly added posts as well. Add the following
snippet of code to the end of the app/component/post/post.less file:
.post {
  overflow: hidden;
  animation: new-post 0.3s;
}

@keyframes new-post {
  from {
    max-height: 0;
    opacity: 0;
  }

  to {
    max-height: 5em;
    opacity: 1;
  }
}
To put some final touches on the posts we'll add a progress indicator to the
pending posts. Add the following snippet to the post component's view
(app/component/post/Post.jsx) at the end of the
<div className='post-author card-footer'> element's content:
<div className="spinner">
  <div className="bounce1" />
  <div className="bounce2" />
  <div className="bounce3" />
</div>
Then add the following declaration to the post component's
app/component/post/post.less file to the .post-author rule:
position: relative;
After that add the following snippet into the .post-author rule (code snippet
obtained from https://tobiasahlin.com/spinkit/ and subsequently modified):
.spinner {
  position: absolute;
  top: 1em;
  width: 70px;
  text-align: center;
  opacity: 0;
  transition: 0.3s opacity;

  & > div {
    width: 16px;
    height: 16px;
    background-color: #333;
    margin-right: 4px;

    border-radius: 100%;
    display: inline-block;
    animation: bouncedelay 1.4s infinite ease-in-out;
    animation-fill-mode: both;
  }

  .bounce1 {
    animation-delay: -0.32s;
  }

  .bounce2 {
    animation-delay: -0.16s;
  }

  @keyframes bouncedelay {
    0%, 80%, 100% {
      transform: scale(0.0);
    }
    40% {
      transform: scale(1.0);
    }
  }
}
And finally add the following snippet at the end of the file:
.post-pending .post-author .spinner {
  opacity: 1;
}
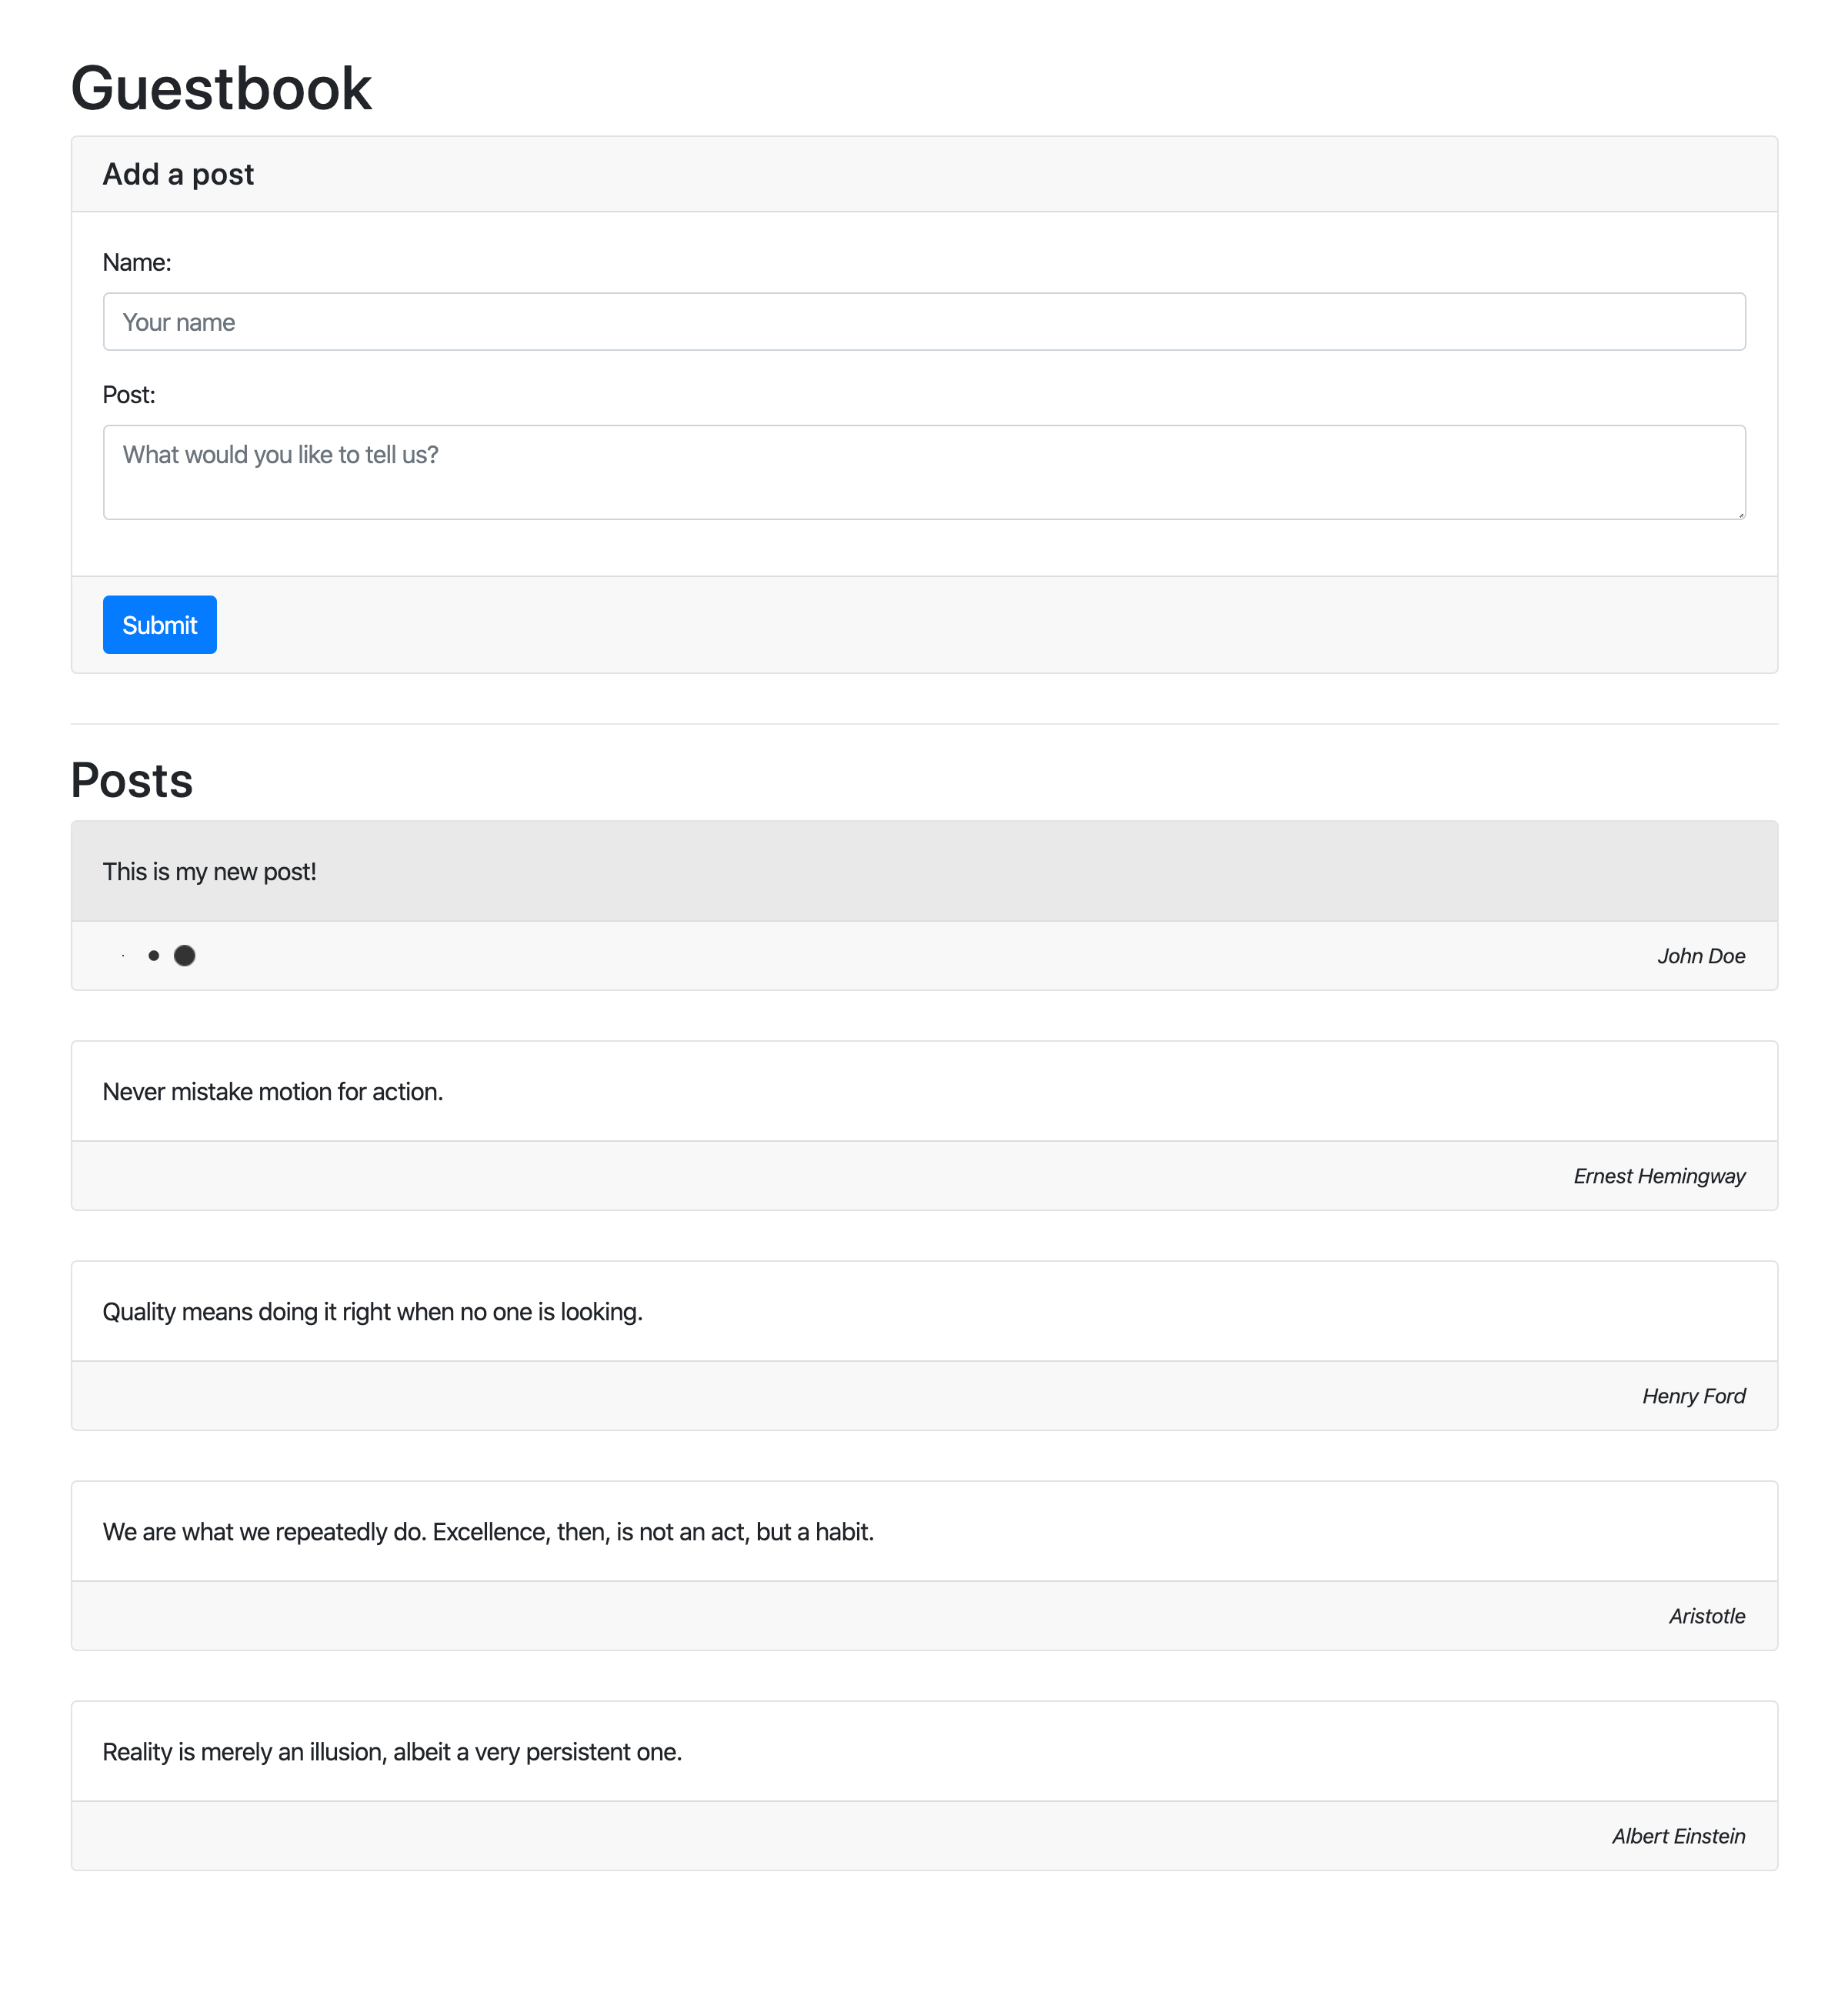
Try writing new posts! The pending posts will have a progress indicator in the lower left corner. If you followed the tutorial from start, the final application should look something like the picture below.
Conclusion
If all went well, you are currently in front of a finished application. I hope you liked the journey and are happy with what you've learned here.
From now I suggest to take a look at our documentation which goes into greater detail in describing each component of IMA.js development stack or take a direct look at the API.
If you see any improvements that could be made to this tutorial, or have found any mistakes, please let us know by creating issue in our IMA.js monorepo, or even better, creating PR.
I bid you farewell!