UI & Controls
The IMA.js devtools consist of 3 main windows - Panel, Popup and Options. Each has some specific usage and we're going to take a look at the first two in following sections.
Panel
Main component of our IMA.js devtools is the panel window, that you get after opening Chrome devtools
(use the keyboard shortcut Cmd + Shift + J on Windows or Cmd + Option + J on Mac)
and clicking on IMA.js tab on any IMA.js application website.
This tab shows you all events (that you defined in the options, which we'll talk about later) and method calls in your application since it's initialization. But there are few other components in this window, that offers some additional functionality, so let's take a closer look at each of those.
Search bar

The search bar allows you to filter all messages using simple fuzzy search. The keywords are currently
matched with payload.label, so searching for values in payloads or any other text, that is not
part of the payload.label will result in invalid search results (this may change in the future versions).
You can also use JS regular expressions for more advance filtering. To use these expressions, simply wrap
the searched string between /(init)/i backslashes. There's built in validation, where if the RegExp is not correct,
the input text will be red and no search is performed.

Search action buttons
In the search bar, we can also find a group of four buttons. First two buttons are related to the currently selected item and allows you to select one directly above or below it. These two buttons also have a key shortcuts defined to arrow up and arrow down, so you can use these too.
The third one clears the currently searched text and last one opens a menu, where additional two buttons let's you either clear whole state (e.g. all messages are deleted) or access additional options.

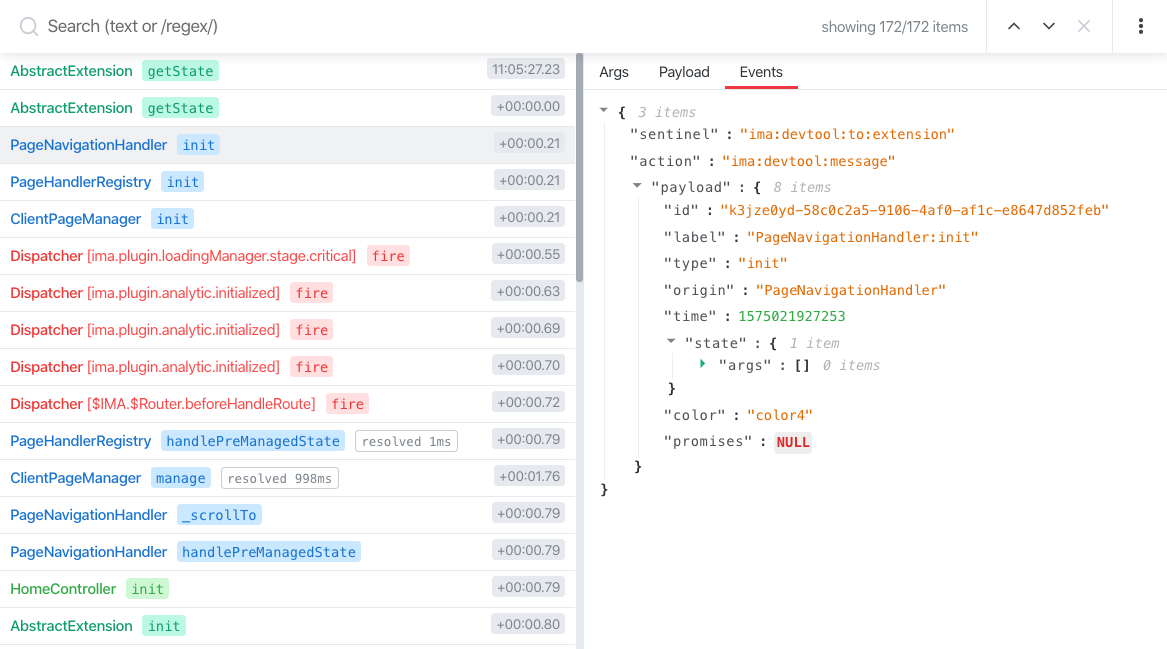
Messages view
![]()
This is probably the main part of whole devtools. Here you can see all events and methods (that have registered hooks in the options) and time they were called relative to the first event received.
The first label in each row corresponds to the class that was an origin of method call, that is displayed
right next to the class name on light background. Optionally on some events you can see pending/resolved xms tag.
This tag marks that some of the arguments of the method call are promises. The pending/resolved status
than corresponds to whenever all promises in the method call are resolved or not. The time in ms than displays
time diff between first call the method and last resolved promise.
Data view
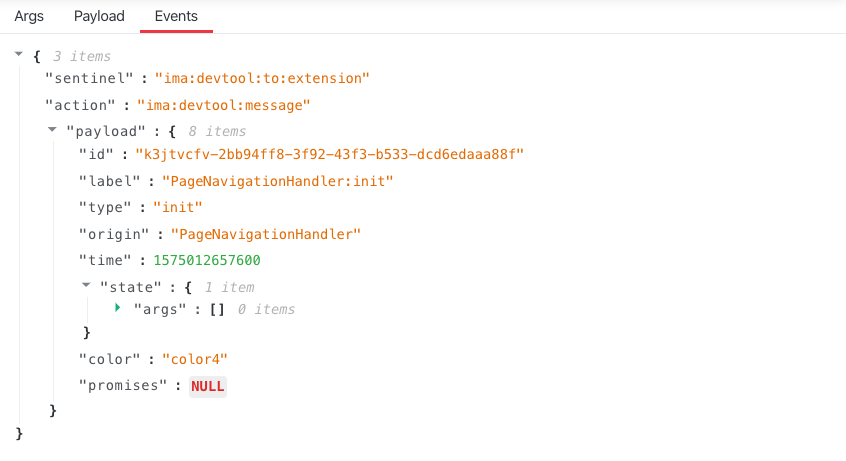
This view has 3 tabs - Args, Payload and Events. Args and Payload are basically shortcut to the last event's payload.state in the Events tab.
Each method call can have one or multiple events, this depends whenever any of the arguments is a promise or not. In case it is, the events is an array
where each new input corresponds to a resolved promise.
Each event has multiple arguments, where most of those are an internal arguments used in the devtools panel or to process the message. Most of the time
you're only interested in args and payload arguments in the payload.state. That's also why we have those two other tabs that are basically shortcuts
to these objects.
Popup
The popup is a simple window that you can see after clicking on the IMA.js extension icon in the chrome toolbar. The main purpose of this window is to give you quick toggle to enable or disable the extension functionality = injecting the scripts and creating devtools panel.
Note: due to limitations of chrome extension API, when you disable IMA.js extension through this popup, the detection and reload scripts are still getting injected to the page. Only thing that doesn't get injected is the devtool code itself, which wraps each class in a proxy like object that sends messages to our devtools panel.
So in case you have any issues with your application and you think it's caused by the devtools, you should completely disable the extension in order to prevent any possible side effects.
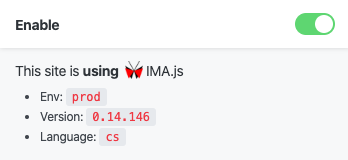
This popup can have 3 states:
- Detecting - you can get a glimpse of this state when you reload the page while the popup is opened and the devtools are still detecting whenever the current page is using IMA.js or not.
- Reload - you can see this state after enabling extension while the page is already loaded. As the name suggest, in order to use the devtools you need to reload the page so the devtools code can be injected to page.
- Dead - this state simply means that the devtools are enabled but you're actually on a pge that doesn't use IMA.js.
- Detected - you can see results of this state in the image above. This means that the page
you're currently visiting is using IMA.js and devtools are initialized. As a bonus you can also
see the application
environment,languageandversion.
Options
This is a separate page, where you can configure the script that is injected into the page and customize it to your needs. As this is rather more complicated we're going to take a deeper look into it in the next section.