Static View
In the first part we went through introduction to IMA.js and initialized our first
application using create-ima-app command. In the second part of the tutorial
we'll actually do some coding and prepare basic Views for our guest book application.
View Component
Open up the app/page/home/HomeView.jsx file in your code editor. You will see a
single ES2015 class named HomeView, extending the AbstractComponent class
(which in turn extends the
React.Component
class). You can read more about components and views in the documentation.
Now let's replace the contents of the file with a blank view:
- JavaScript
- TypeScript
import { PageContext, AbstractComponent } from '@ima/react-page-renderer';
import './homeView.less';

export class HomeView extends AbstractComponent {
  static get contextType() {
    return PageContext;
  }

  render() {
    return null;
  }
}
import { PageContext, AbstractComponent } from '@ima/react-page-renderer';
import './homeView.less';

export class HomeView extends AbstractComponent {
  static get contextType() {
    return PageContext;
  }

  render() {
    return null;
  }
}
The HomeView class defines the render() method. Notice that our current
HomeView class does not have the constructor() method, as the default
one provided by the AbstractComponent class will do in this case.
The constructor() is the class constructor (an object initializer, if you
will) that sets the component's initial properties (props) and context. The
props object represents the properties set on our view component by the
code using it (the properties are set using the element attributes in JSX,
you can find out more about this
here). The
context is an object representing the "globals" for the React components in
the application. IMA.js uses the context to pass view utils to components,
you can find out more about it
here.
There's also static getter contextType() which returns PageContext, that
by default provides the component access to global $Utils object in the component context.
This object is very useful as we can bind custom helper methods to it in the
bind.jsfile with the help of Object Container. But we'll talk about this a bit more
later in this tutorial
The render() method creates and returns a React element that represents the
view in the UI. Our render() method returns null because our component does
not have a UI yet.
Now that we know our way around our component, let's replace the contents of
the render() method with the following code:
- JavaScript
- TypeScript
return <div className='l-home container'>Hello {'World'}!</div>;
return <div className='l-home container'>Hello {'World'}!</div>;
The "HTML" code you see is actually an XML markup with JavaScript expressions embedded within curly braces. This markup is processed automatically by Babel's JSX transformer into ordinary JavaScript expressions creating React elements (React's virtual DOM allowing rendering at both the client and the server side). This combination of JavaScript and XML is commonly referred to as JSX and you can find out more about it here.
The render() method must always return a React element (or a similar plain
object, or null), so it can be properly rendered at both the client and
server. Never attempt to create an actual DOM element in your view - your
application will most likely break! This is because your code is run at the
server first, where no DOM is available, and polyfilling it, while possible,
would introduce a large overhead. Additionally, since the UI is rendered using
React which modifies the DOM at the client side, any changes to the DOM you would
manage to make would likely be lost with the next update of the page's UI.
If everything went well you should see the following page when you refresh your browser:

Guestbook form & SMACSS
Let's modify the return value of the render method to look like this:
- JavaScript
- TypeScript
return (
  <div className='l-home container'>
    <h1>Guestbook</h1>

    <div className='posting-form card'>
      <form action='' method='post'>
        <h5 className='card-header'>Add a post</h5>
        <div className='card-body'>
          <div className='form-group'>
            <label htmlFor='postForm-name'>Name:</label>
            <input
              id='postForm-name'
              className='form-control'
              type='text'
              name='author'
              placeholder='Your name'
            />
          </div>
          <div className='form-group'>
            <label htmlFor='postForm-content'>Post:</label>
            <textarea
              id='postForm-content'
              className='form-control'
              name='content'
              placeholder='What would you like to tell us?'
            />
          </div>
        </div>
        <div className='card-footer'>
          <button type='submit' className='btn btn btn-outline-primary'>
            Submit
            <div className='ripple-wrapper' />
          </button>
        </div>
      </form>
    </div>
    <hr />
    <div className='posts'>
      <h2>Posts</h2>
      <div className='post card card-default'>
        <div className='card-body'>Never mistake motion for action.</div>
        <div className='post-author card-footer'>Ernest Hemingway</div>
      </div>
      <div className='post card card-default'>
        <div className='card-body'>
          Quality means doing it right when no one is looking.
        </div>
        <div className='post-author card-footer'>Henry Ford</div>
      </div>
      <div className='post card card-default'>
        <div className='card-body'>
          We are what we repeatedly do. Excellence, then, is not an act, but
          a habit.
        </div>
        <div className='post-author card-footer'>Aristotle</div>
      </div>
      <div className='post card card-default'>
        <div className='card-body'>
          Reality is merely an illusion, albeit a very persistent one.
        </div>
        <div className='post-author card-footer'>Albert Einstein</div>
      </div>
    </div>
  </div>
);
Whoa, that's a lot of code! But don't worry, it's just a form we'll use to
write new posts and some example posts. Notice the CSS class we put on the root
element though, l-home. It is considered a good practice to add such a CSS
class on the root element of every React component and/or controller view. The
CSS class name should be the slugified version of the React component's /
controller's name, for example MyAwesomeComponent would become
my-awesome-component. Additionally, it is recommended to prefix the
controller's name with l- (think "layout"), leading to l-home for our
Home controller's view.
The main point of this practice is that it enables easy scoping of CSS rules that should affect only the contents of the component and not the rest of the page, thus reducing the amount of possible conflicts in CSS declarations.
The l- prefix used in the case of controller views is added to prevent
possible collisions with components that might share the same name, and to
allow easy inclusion of single page-specific overrides for the UI of your
components that will not affect the rest of the pages in your application.
In general, it is recommended to organize your CSS code according to the SMACSS recommendation (Scalable and Modular Architecture for CSS). Feel free to read through the page if you are not familiar with SMACSS yet, it won't take you long.
Styling our form
So let's make our guestbook look a little better. To achieve this, we'll use the Bootstrap library. To make things simple, we will just use the CDN-hosted CSS file, since we don't need any of Bootstrap's JS components in our example anyway.
In a real application, we strongly recommend you manage these dependencies yourself (for example through npm packages), and consider using a custom build that includes only the necessary CSS/JS.
First we need to include a few files to our page. Open the document component
app/component/document/DocumentView.jsx (this is the UI component that renders the basic structure of the HTML document. You'll find more details about it in the Rendering the whole document section of this chapter).
Insert the following code before the <link rel="stylesheet" ... line to include
the Bootstrap CSS library:
<link
  rel='stylesheet'
  href='https://stackpath.bootstrapcdn.com/bootstrap/4.3.1/css/bootstrap.min.css'
  integrity='sha384-ggOyR0iXCbMQv3Xipma34MD+dH/1fQ784/j6cY/iJTQUOhcWr7x9JvoRxT2MZw1T'
  crossOrigin='anonymous'
/>
This will save us a lot of effort with styling our UI.
Defining custom styles
Let's write some CSS to make our guestbook look even better. Open the
app/less/globals.less file and add the following code to set up our
layout configuration:
@post-author-alignment: right;
Next open the app/less/app.less file and add the following code below the existing one:
form {
  margin-bottom: 0;
}
Now let's open the app/page/home/homeView.less file and replace the
contents with the following code:
.l-home {
    margin-top: 2rem;

    .post-author {
        text-align: @post-author-alignment;
        font-style: italic;
        font-size: 85%;
    }

    .card {
        margin-bottom: 2rem;
    }
}
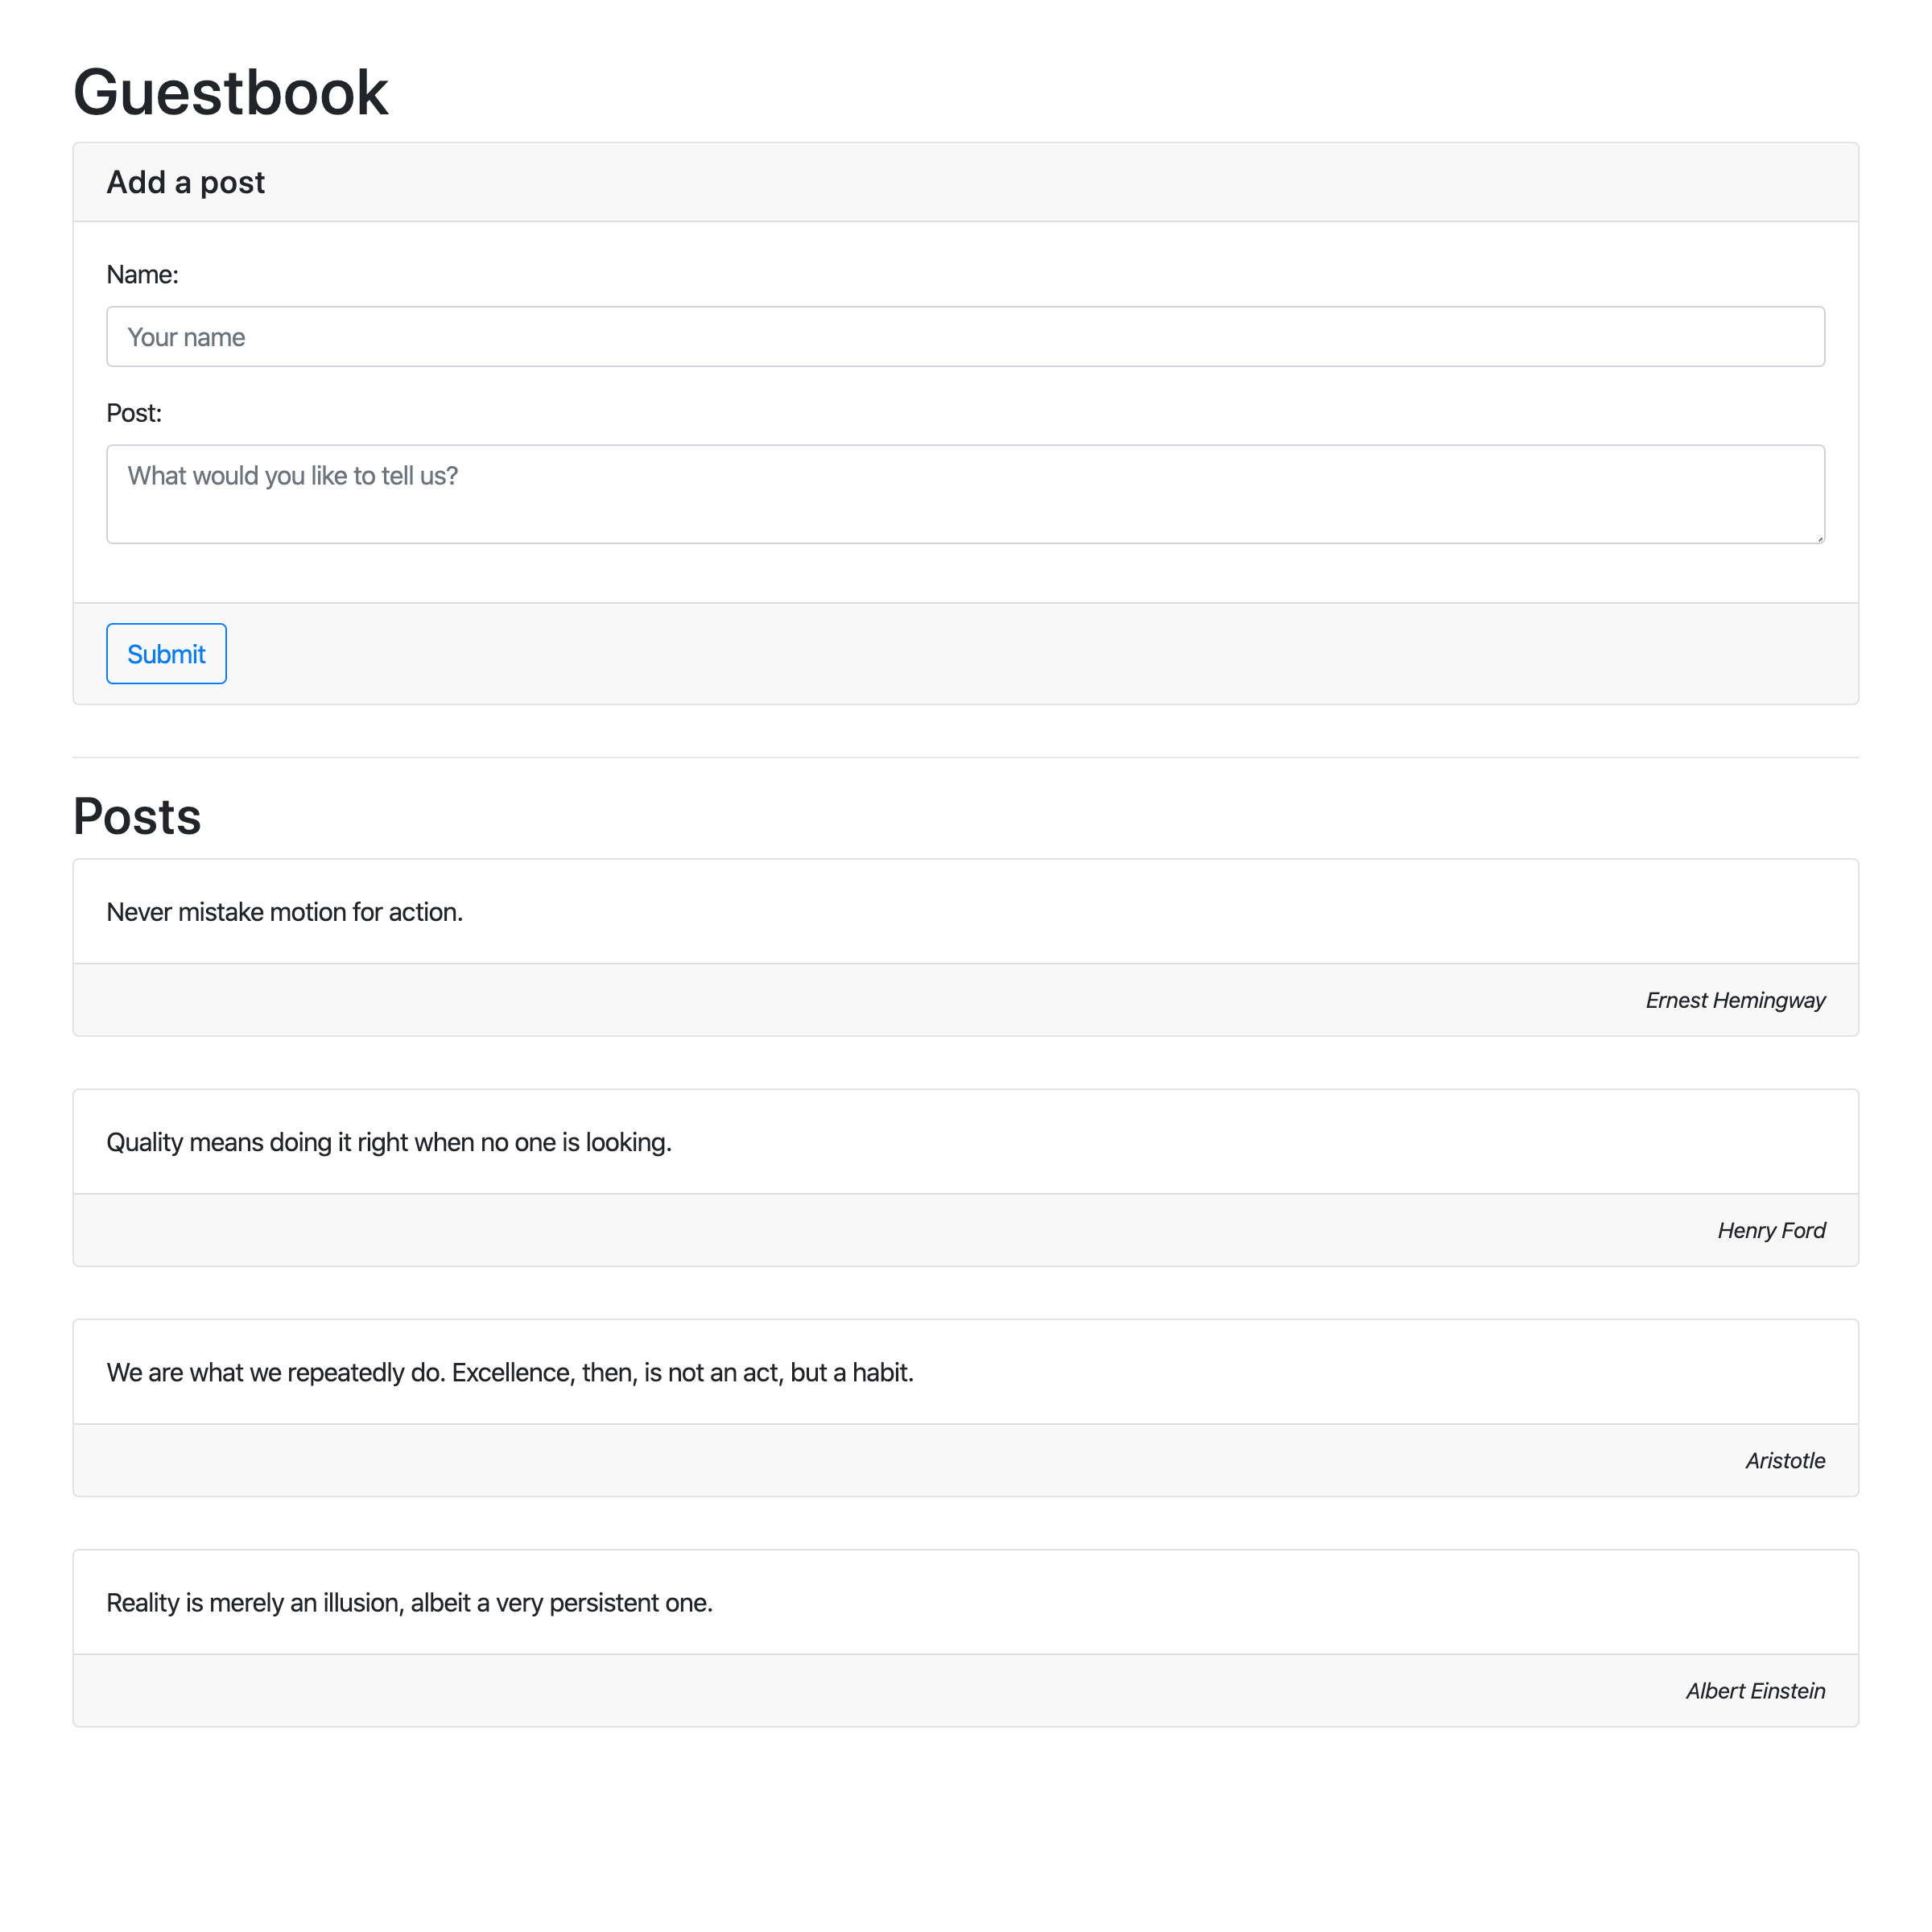
Go ahead and check the results in the browser. It sure does look a little
better (you may have to reload the page, or event restart the dev server
by hitting Ctrl+C and then re-running the npm run dev command if your
browser cannot access the newly installed resources). In the end of this section
you should see something like this when you refresh your page.
Rendering the whole document
As you may have noticed, we didn't specify any <html> or <body> element in
our controller view, and yet the page rendered in the browser has them. So how
did this little piece of magic happen?
As you may recall from the beginning of this tutorial, the app/component
directory contains components that are used in the application UI. There is one
special component - the document component
(app/component/document/DocumentView.jsx). The document component handles
rendering the basic structure of the HTML document like the <html> and
<body> elements.
Finally, the document component must render three elements, <div id="page">,
<script id="revivalSettings"> and <script id="scripts">.
#page- is a place where current view is rendered.#revivalSettings- contains JavaScript code used to initialize the environment for your application at the client side.#scripts- contains the JavaScript logic of your application.
The order is important as this will allow your users to see the whole of the page content before the application is fully loaded in the browser (remember, the content is first rendered at the server side).
The one thing the document component does not render and is handled by IMA.js
itself is the <!doctype html> doctype at the beginning of the rendered page -
this is due to the limitations of the React library, but you don't need to
concern yourself with this very much.
Note that the document component is only used at the server-side, as the
application only updates the contents of the #page element at the
client-side (and the page title and meta tags through the meta-manager, which
will not be covered by this tutorial, but you can learn more about its interface
in the API /basic-features/seo-and-meta-manager).
For more information about DocumentView and whole rendering process of IMA.js
application, take a look at the documentation.
Notes on ES2015 modules and IMA.js namespaces
Starting with version 15 of IMA.js namespaces were deprecated in favor of ES2015 modules. Mainly because ES modules are now more widespread and have better support in many IDEs thus don't pose such a problem when it comes to refactoring.
Previously almost all the JavaScript files in your IMA.js application included a snippet of code like this one near the beginning:
import ns from 'ima/namespace';

ns.namespace('app.foo.bar');
and ended with a line of code like this one:
ns.app.foo.bar.Baz = Baz;
The first snippet imports the object that represents the root namespace for the
classes, constants and values in the application, and then ensures that the
namespace to which the class / constant / value will be bound exists by calling
ns.namespace('namespace name goes here'). The second snippet binds the class,
constant or value created in the file to the namespace.
If you're using version 15 and above you can safely remove deprecated namespaces
and replace them with ES2015 import
and export.